Single-sig/Multi-sig accounts
From the wallet dashboard, click on the "+" icon as suggested by the image below.

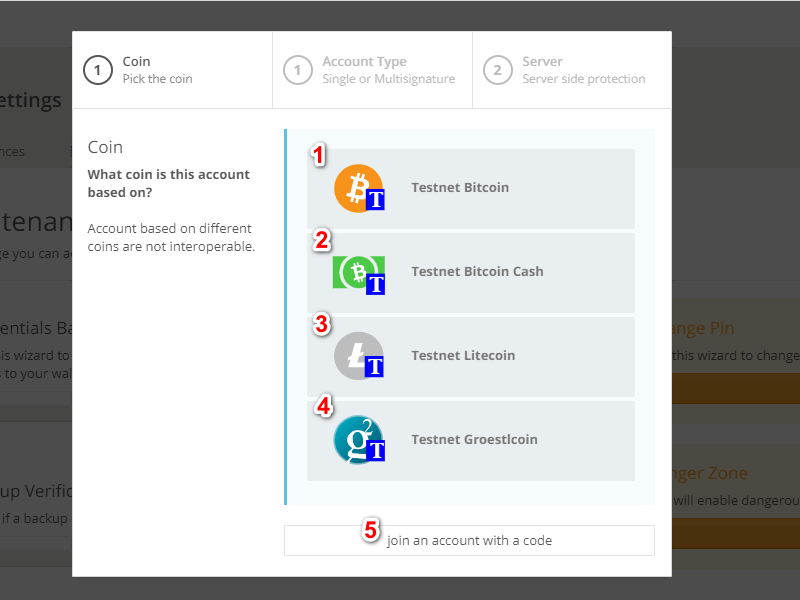
On the new page, you will notice the first passage on three that will allow you to open a new account on Melis. The first step concerns the choice of coins among those supported by Melis: Bitcoin, Bitcoin Cash, and others (increasing). In the following image you can see them from the numerical count. The voice numbered with 5 represents the possibility of joining a multi-user account with prior receipt of an accession code.
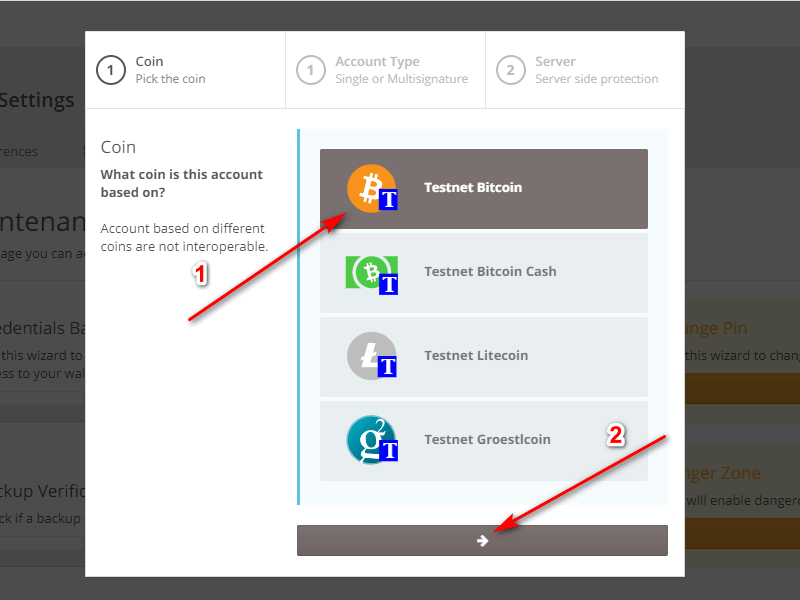
Select the coin of your choice and continue.
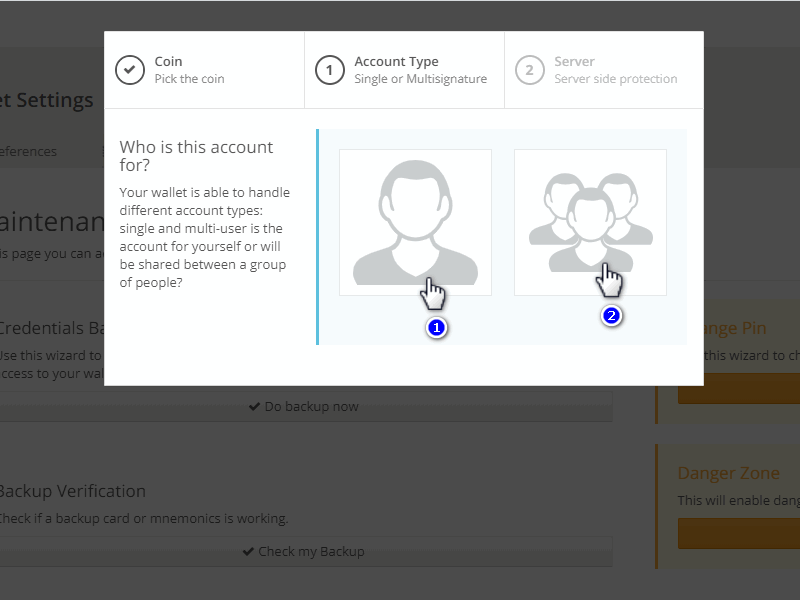
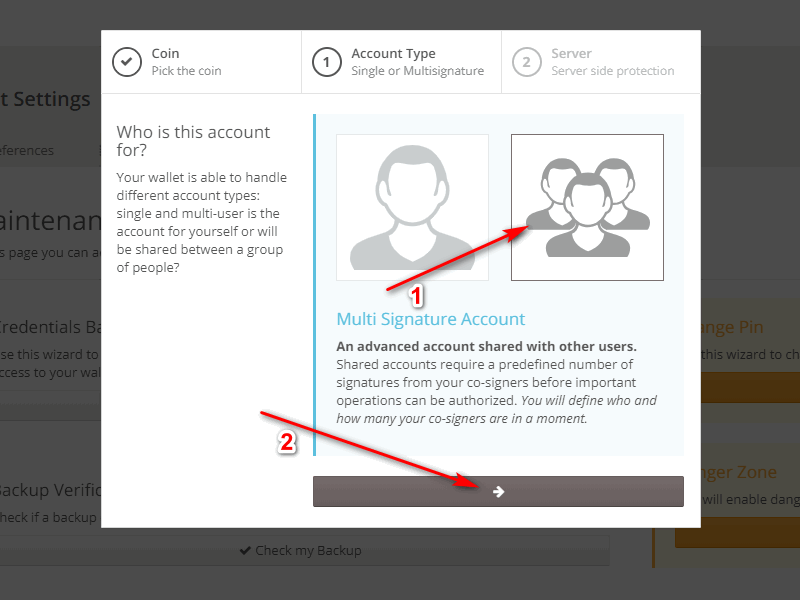
In the second step, you have to choose whether your account should be "headed" only to you, or shared with other users.
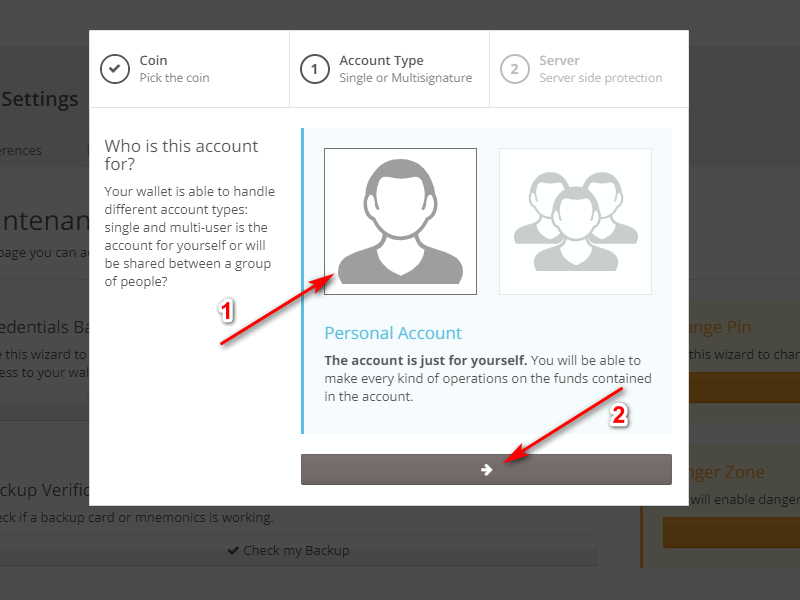
Let's consider a single account. There are two types: one with a single classic signature (technically called "HD"), and one with a double signature where the second signature is that of the server. Then proceed as shown in the image below, by selecting the single stylized figure and then confirming your choice.
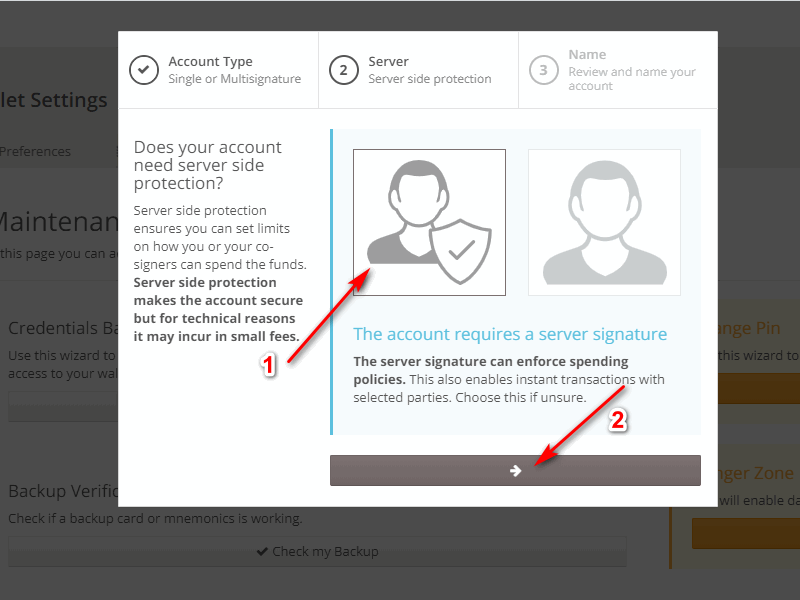
Now you have to select whether to add Melis's signature to your account or not. The need for server signing is an important component, because it allows Melis to enforce the policies chosen for the account, in particular the use of a TFA code ( Hot to enable 2FA) and expenditure limits. It is therefore a system that significantly increases the account security. There are two contraindications: 1) the transactions are slightly larger and therefore potentially with more expensive fees; 2) if the Melis server for any reason disappears, or ceases to function, it would be necessary to perform a procedure to recover access to one's own funds (see the appropriate FAQ on: How to use the recovery mode).
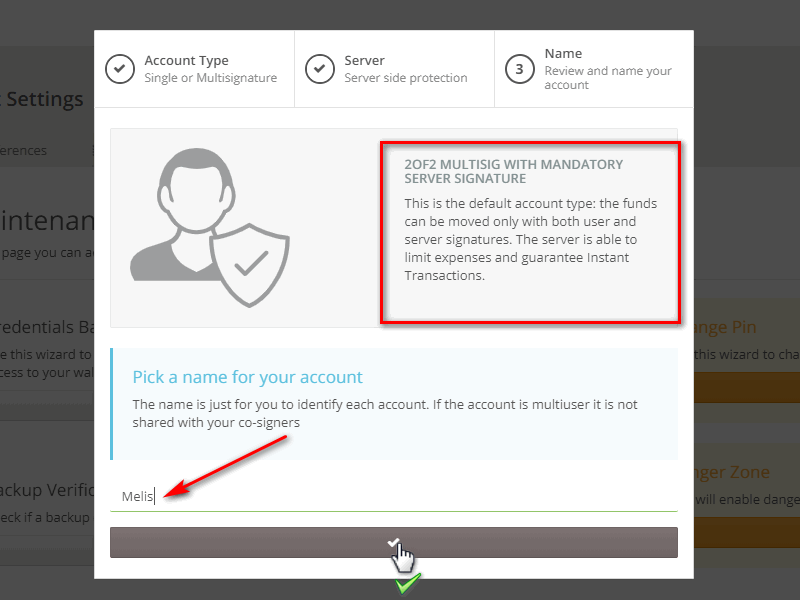
The third step consists in choosing the name of your account and confirming the entire operation after reading the summary about what you have chosen.
As mentioned at the beginning of this FAQ, there is also the possibility to open multi-user accounts in Melis. The procedure for creating one is very similar to the one concerning the single account. As above, click on the "+" icon and choose the coin.

The new screen will ask you whether to open a single or multi-user account. This time click on multi-user and proceed.
Continue by choosing whether to enable server protection or not.

In the next screen you'll see the account details. Let's start with 2 users, a minimum amount for a muti-user account. Next step is to give a name to the second co-signer.

After that, you'll see that in the lower left part of the screen a cross appears. By clicking on it you can add, if necessary, additional users.
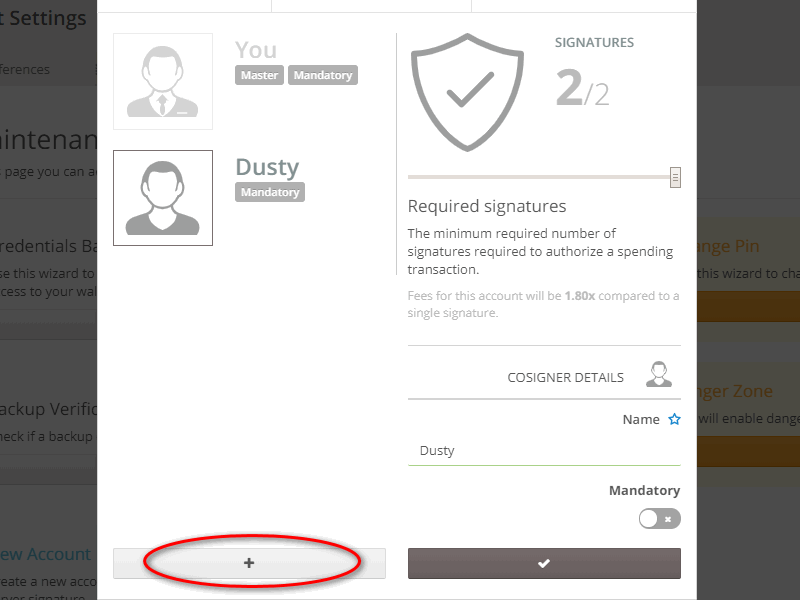
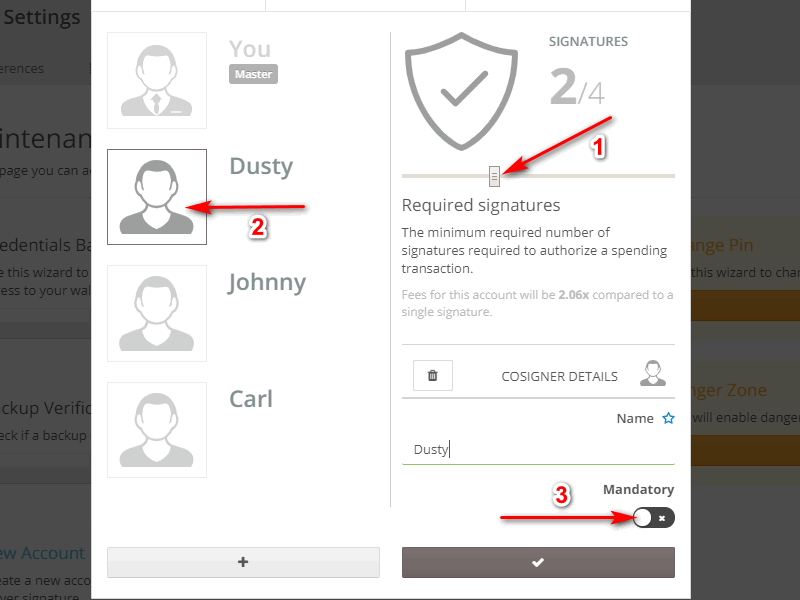
After adding all the users that you want to be part of the account, choose which signatures are mandatory by clicking on the "mandatory" button of those users that you want to make indispensable when sending transactions. First of all, move the cursor to determine how many signatures are needed to manage the wallet (in our case 2 out of 4). Then choose the other user, in addition to yourself, which signature is mandatory. Finally click on mandatory to make it effective.
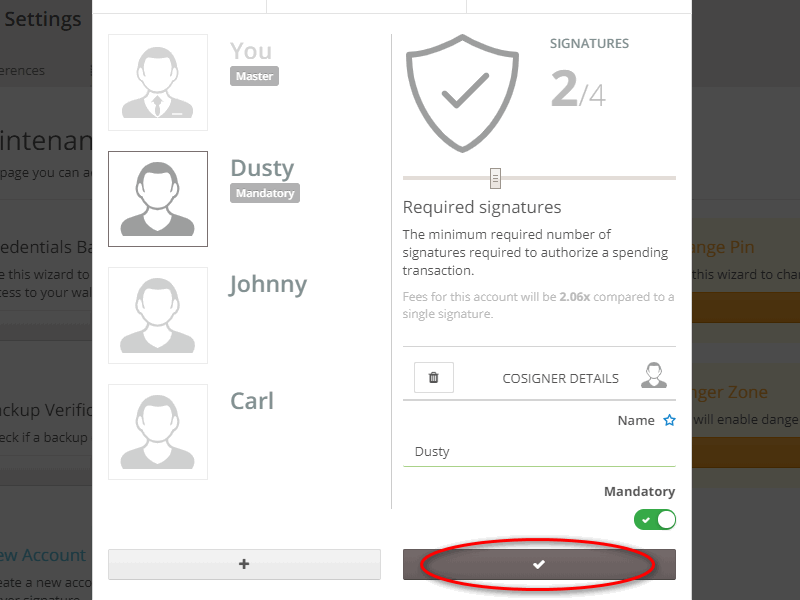
Once finished with these operations, click on the gray button as in the image below and confirm.
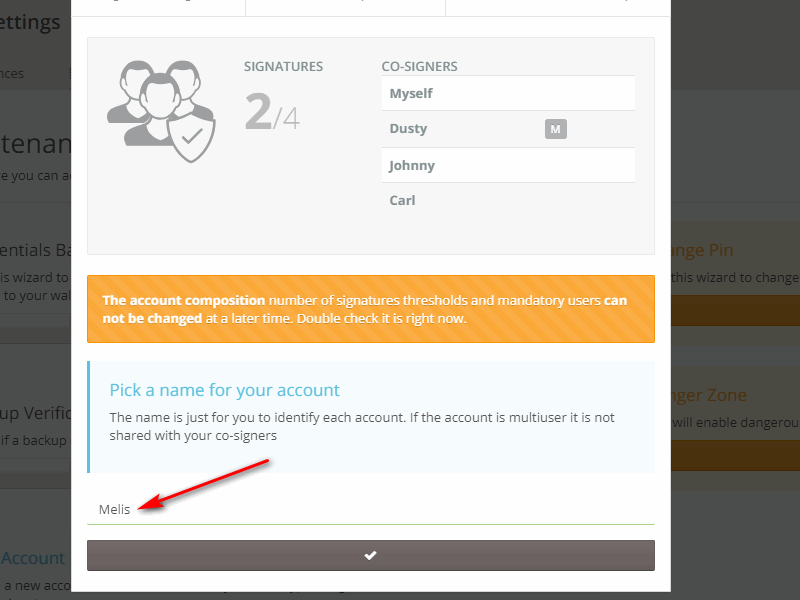
Finally you'll arrive in the summary screen where it will be summarized all the operations done. If everything is in order with your needs, enter the account name and confirm.
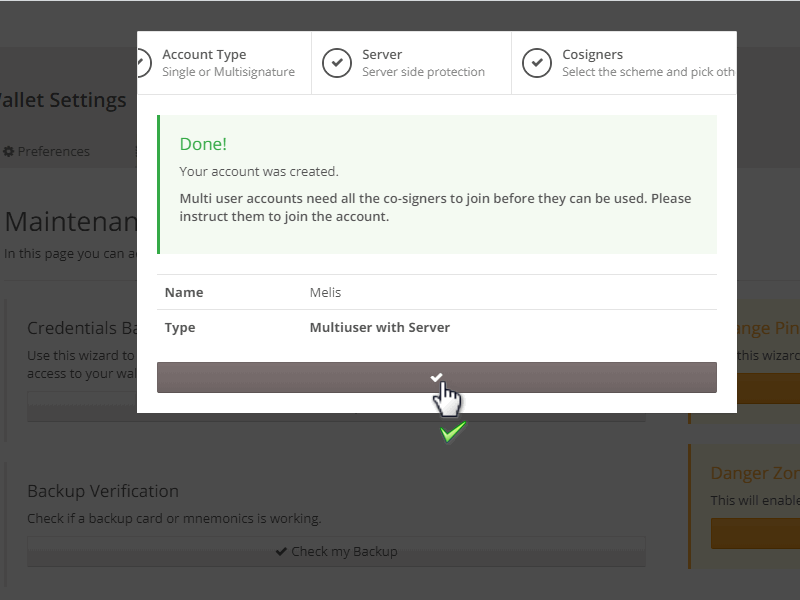
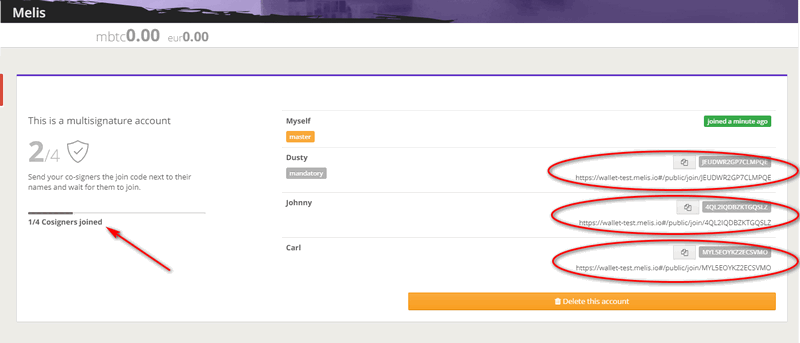
After confirming you'll be redirected to the newly created account screen and here you'll see all the details. In order for other users to be able to join such an account, it is necessary to communicate the code you see in the various circles in the image below. As the signers join the account, based on the unique code assigned to them, the number indicated by the arrow in the image below will change.
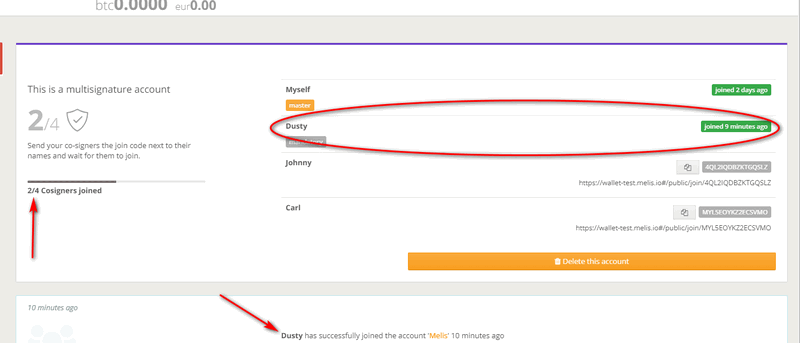
As the other users join the multi-user account, you'll see the following parameters change.
Don't you find the answer you need?
Click on the "Feedback" button at the bottom left and explain us your problem.